Fibonacci Retracement Levels in Forex: Complete Trading Guide 2026
Master Fibonacci retracement levels for forex trading. Learn the key 38.2%, 50%, and 61.8% levels, proper drawing techniques, and risk management.

What Are Fibonacci Retracement Levels?
Look at any forex chart right now. Draw a Fibonacci retracement from the last significant swing low to swing high. Now count how many times price respected the exact 61.8% level to the pip.
Zero? Maybe one?
Yet thousands of trading articles will tell you the 61.8% level is the "golden ratio" where price magically reverses. They'll show you cherry-picked examples where it worked perfectly. What they won't show you is the institutional approach that actually generates consistent results.
The key shift: Professional traders don't use Fibonacci levels as triggers. They use them as decision zones.
The difference isn't semantic. It's mechanical. And it's why retail traders get stopped out at "perfect" Fibonacci levels while institutional traders build positions profitably in the same areas.
Let's start with what everyone thinks they know about Fibonacci trading. The sequence itself (0, 1, 1, 2, 3, 5, 8, 13, 21) creates ratios when you divide adjacent numbers. The most common retracement levels are 23.6%, 38.2%, 50%, 61.8%, and 78.6%. The 50% level isn't even a Fibonacci ratio, but traders use it because of Dow Theory's half-retracement principle.
Most educational content stops there. Draw the tool from swing low to high in an uptrend. Wait for price to pull back to a level. Enter. Place your stop below the swing low.
The Mathematics Behind Fibonacci Trading
Simple, clean, and completely inadequate for real market conditions.
Because here's what that approach misses: Fibonacci levels are zones of decision, not zones of reversal. The market doesn't reverse because it hits 61.8%. It reverses when enough participants decide the risk-reward at that level justifies action. Sometimes that happens at 61.8%. Sometimes at 59%. Sometimes at 64%.
The mathematics behind Fibonacci trading reveals why precision is an illusion. The golden ratio (1.618) appears throughout nature because it represents optimal efficiency in growth patterns. But financial markets aren't flowers. They're driven by human psychology, algorithmic flows, and liquidity clusters.
When you understand this, you stop looking for exact levels and start looking for zones. The 38.2% to 61.8% area becomes what institutional traders call the "decision zone", where the probability of continuation versus reversal reaches equilibrium.
Think about it from a market structure perspective. A retracement to 38.2% suggests strong trend momentum. Buyers (in an uptrend) are stepping in early, not wanting to miss the move. A retracement to 78.6% suggests weakness. The trend might be exhausted, Liquidity in Trading: A Practical Guide for Funded Accounts.
But the 38.2%-61.8% zone? That's where the real decision happens. It's deep enough to shake out weak hands but shallow enough to maintain trend structure.
How to Draw Fibonacci Retracement Correctly
Now let's get practical about drawing Fibonacci retracements correctly. This is where most traders fail before they even start analysing levels.
Step 1: Identify the trend. Not just "price is going up." Look for a clear impulse move with higher highs and higher lows (uptrend) or lower highs and lower lows (downtrend). The move should be obvious on your timeframe. If you're squinting to see it, it's not significant enough.
Step 2: Find significant swing points. "Significant" means the high or low that would make you wrong about the trend if broken. In an uptrend, it's the low that launched the impulse. In a downtrend, it's the high that started the decline.
Step 3: Apply the tool from swing low to swing high (uptrend) or swing high to swing low (downtrend). Don't adjust it to make levels "fit" better. The market doesn't care about your curve-fitting.
Here's where the institutional approach diverges from retail. Retail traders draw Fibonacci and immediately start looking for entries at levels. Institutional traders draw Fibonacci and then observe how price behaves as it enters different zones.
The most important Fibonacci levels aren't individual lines. They're behavioural zones:
• The 23.6% level indicates minimal pullback and strong momentum
• The 38.2% zone (35-40%) shows buyers stepping in early
• The 50% level represents psychological equilibrium
• The 61.8% zone (58-65%) marks the last defence for trend continuation
• The 78.6% level suggests potential trend exhaustion
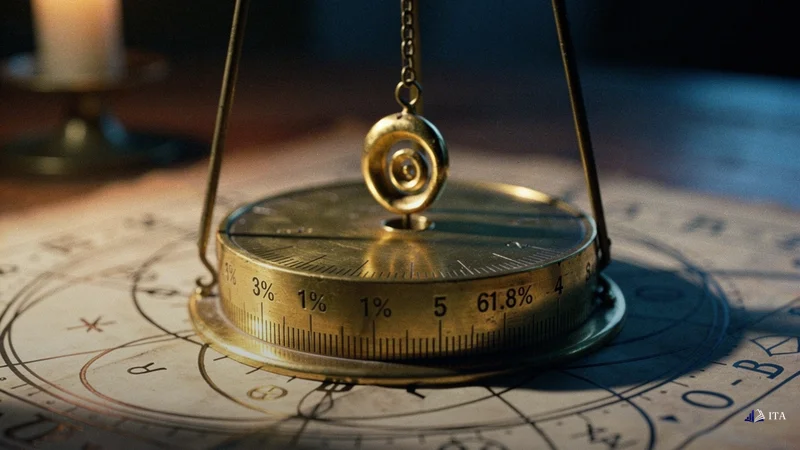
The Most Important Fibonacci Levels
The 38.2% retracement level represents minimal pullback. When price holds above this level in an uptrend, it signals exceptional strength. But here's the nuance: "holding above" doesn't mean bouncing exactly at 38.2%. It means price enters the 35-40% zone and finds buyers.
The 50% retracement level is psychologically significant despite not being a Fibonacci ratio. It represents equilibrium (half the move retraced). Traditional technical analysis suggests this is the maximum retracement for a healthy trend. In practice, it's often where the real battle between buyers and sellers occurs.
The 61.8% level gets the most attention. The famous golden ratio.
But treating it as a precise reversal point? That's missing the forest for the trees. The 61.8% level is significant because it's deep enough to trigger stops above the 50% level but shallow enough to maintain trend structure. It's the last line of defence for trend continuation.
But here's the revelation that changes everything: the 38.2%-61.8% decision zone strategy.
Instead of waiting for price to hit exact levels, institutional traders monitor price behaviour as it enters this entire zone. They're looking for confluence (areas where Fibonacci zones align with other structural elements), Liquidity in Trading: A Practical Guide for Funded Accounts.
What kind of confluence? Previous support or resistance levels. Trendline touches. Moving average dynamic support. Liquidity clusters visible in the order book. Volume profile peaks.

The 38.2%-61.8% Decision Zone Strategy
When price enters the decision zone AND shows confluence with structure, that's when professionals begin building positions. Not all at once. They scale in as price proves it's respecting the zone.
This approach solves the biggest problem with retail Fibonacci trading: the stop hunt. When everyone places stops just below the 61.8% level, guess where market makers push price? Just below that level, triggering stops before reversing.
By treating Fibonacci as zones rather than lines, you avoid the precision trap. Your stop isn't at an obvious level. Your entry isn't at a crowded price. You're trading with market structure, not against it.
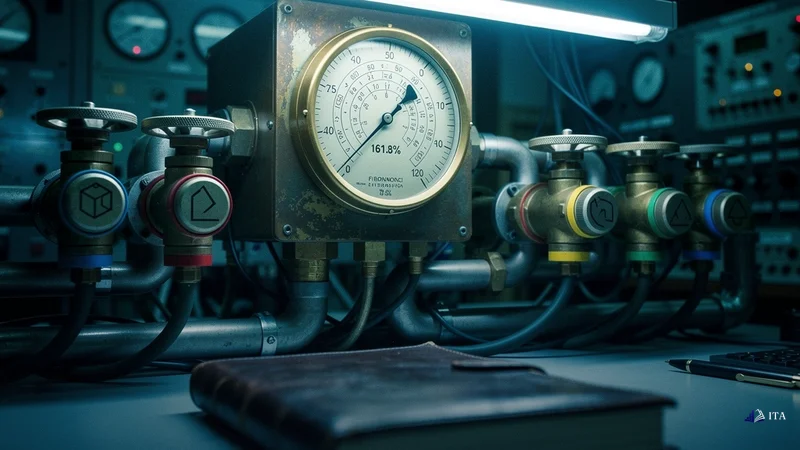
Fibonacci extensions for profit targets complete the framework. If retracements help with entries, extensions project exits.
The primary extension levels are 127.2%, 161.8%, and beyond. Here's the practical application: if price retraces to the 50% level and reverses, the 161.8% extension often acts as the next major resistance.
But again, precision is an illusion. The 161.8% extension isn't a magical exit point. It's a zone where you should start watching for exhaustion signs:
• Decreasing volume on approach
• Momentum divergence on oscillators
• Rejection candles at the level
• Order flow imbalance
• Time-based exhaustion patterns

Fibonacci Extensions for Profit Targets
Risk management with Fibonacci retracement levels requires strategic position sizing based on zone width. Professional traders don't simply place stops at obvious levels.
Here's the framework: Your stop loss goes beyond the entire decision zone, not at a specific level within it. If you're buying a pullback in an uptrend, your stop might be below the 78.6% level, giving the trade room to breathe. This approach acknowledges that price often tests multiple Fibonacci retracement levels before resuming the primary trend.
Position sizing then works backwards from maximum acceptable loss. If the zone is 50 pips wide and your maximum risk is $500, your position size is $10 per pip. This approach ensures you're not stopped out by normal market noise while maintaining disciplined risk control.
The risk-reward calculation also changes. Instead of targeting a fixed 2:1 ratio, you calculate reward based on the next structural level or Fibonacci extension. Sometimes that's 1.5:1. Sometimes it's 3:1. The market structure determines the opportunity, not an arbitrary ratio.
At Institutional Trading Academy, we see this play out daily in funded accounts. Traders who treat Fibonacci as precise triggers have erratic results. One day they nail the exact level. The next day they're stopped out by a pip.
But traders who use the decision zone approach? They build consistent profitability. They're not trying to predict exact reversal points. They're identifying areas where probability favours action, then waiting for the market to confirm.
This is particularly powerful in funded account evaluations where consistency matters more than home runs. You don't need to catch the exact bottom of every retracement. You need to identify high-probability zones and manage risk appropriately, What Is A Prop Firm In Forex? Unlocking the Secrets of Forex Trading.

Combining Fibonacci with Market Structure
Consider this scenario: Price is in an uptrend and pulls back into the 38.2%-61.8% zone. But the zone also contains the previous resistance level that should now act as support. Additionally, the 50-day moving average runs through the middle of the zone.
That's triple confluence. Not because three indicators align perfectly at one price, but because three analytical frameworks identify the same general area as significant.
The institutional approach? Wait for price to enter this confluence zone, then watch how it behaves. Does it immediately reverse? That suggests strong buying interest. Does it consolidate? Buyers and sellers are battling for control. Does it slice through? The trend might be reversing.
Fibonacci extensions help traders identify profit targets beyond the initial price move. When combined with market structure analysis, these levels become powerful tools for determining where price might reach after breaking through resistance or support. Extensions project potential price targets based on the magnitude of the previous trend move.
The shift from precision to zones might seem subtle, but it fundamentally changes how you interact with the market. You stop fighting for perfect entries. You stop getting stopped out at obvious levels. You start trading with market flow rather than against it.
Remember: Fibonacci retracements don't predict the future. They identify areas where market participants have made decisions in the past and might make them again. The magic isn't in the numbers. It's in understanding how other traders use those numbers and positioning yourself accordingly.
The next time you draw a Fibonacci retracement, resist the urge to place an order at exactly 61.8%. Instead, identify the 38.2%-61.8% decision zone. Look for confluence with structure. Wait for price to show its hand. Then act with the confidence that comes from trading with probability, not prophecy.
Ready to apply institutional-grade analysis to your trading? At ITA, we fund traders who understand that precision is an illusion and probability is reality. Start your funded account journey today.
Risk Management with Fibonacci Retracements
Frequently Asked Questions
What is the best Fibonacci retracement level in forex?
The 61.8% level is considered the golden ratio and most significant retracement level. However, professional traders use the 38.2%-61.8% zone as a decision area rather than targeting exact levels. The strongest setups occur when Fibonacci zones align with other structural elements like support, resistance, or moving averages.
How do you draw Fibonacci retracement on Match Trader?
Select the Fibonacci Retracement tool from the toolbar, then click and drag from swing low to swing high in an uptrend, or swing high to swing low in a downtrend. Use significant swing points that would invalidate the trend if broken. Avoid adjusting the tool to make levels fit price action.
Is the 50% Fibonacci level valid even though it is not a true Fibonacci ratio?
Yes, the 50% level remains psychologically significant despite not being a mathematical Fibonacci ratio. It represents equilibrium where half the move has retraced, and traditional technical analysis suggests this is the maximum healthy retracement for trend continuation. Many traders use it based on Dow Theory principles.
What stop loss should I use with Fibonacci retracement?
Place stops beyond the entire decision zone, not at specific levels within it. For uptrend pullbacks, position stops below the 78.6% level with a volatility buffer. This prevents stop hunting at obvious levels while giving trades room to breathe within normal market noise.
How can Fibonacci retracement be used in a funded trading account?
In funded accounts, treat Fibonacci as a risk management framework rather than prediction tool. Use the 38.2%-61.8% decision zone for entries, position size based on zone width, and combine with market structure for confluence. This approach builds consistency required for funded account evaluations.

Key Takeaways
- Use Fibonacci retracements as decision zones, not precise reversal points — the 38.2%-61.8% area identifies where probability favours action.
- Draw Fibonacci from significant swing points that would invalidate the trend if broken, not minor fluctuations or convenient levels.
- Combine Fibonacci zones with market structure confluence — previous support/resistance, moving averages, and volume clusters for higher probability setups.
- Place stops beyond the entire decision zone rather than at obvious levels like 61.8% to avoid institutional stop hunts.
- Scale into positions as price proves it respects the zone instead of entering all at once at exact levels.
- Use Fibonacci extensions at 127.2%, 161.8%, and 261.8% as profit target zones, not precise exit points requiring confirmation signals.
- Position size based on zone width rather than fixed ratios — calculate backwards from maximum acceptable loss across the entire zone.
Start Your Trading Evaluation
Simulated funded accounts up to $800K. Up to 95% profit split.
Get Funded